Technique Ribbon Neon Lines Tutorial

Today I will teach you about Photoshop Technique Ribbon Neon Lines Tutorial
- First of all Open New Document of Custom size, Height & Width 600×600 pixels,Resolution 72 & Mode RGB Color

- Now select ‘Brush Tool’
 & use the following settings

- Now select ‘Pen Tool’
 & then create the following shape

- Now Open New Layer & then right click select “Stoke Path”.In ‘Stroke Path’ select Brush with “Simulate Pressure” Ok

- Now your image should look like as shown below

- Now to Window>Action & then create the NEW ACTION with the help of click on following which is indicating by Hand sign

- Now give the ‘lining’ name & then ‘Record’

- Now Begin the recording with the help of click on Red Button like as shown below

- Now make the Duplicate Layer with the help of Ctrl+J & then little Rotate the shape with the help of Ctrl+T & then press

- Now stop the Recording with the help of click on following Button which is indicating by Hand sign

- Now click on the following Button which is indicating by Hand sign

- Now your image should look like as shown below

- Now your Layer Pallete should look like as shown below

- Now Hide the Background layer & after that right click on any layer,select ‘Merge Visible’ & after that Unhide the

- Now make the Duplicate layer with the help of Ctrl+J & then Press Ctrl+U, use the following settings

- Now your image should look like as shown below

- Now Open New Layer [this Layer should below all layer] & then fill with any color & after that go to Blending Options
Photoshop Technqiue-How to use the Gradient Overlay features


- Now your image should look like as shown below

- Now once again make the Duplicate Layer2 with the help of Ctrl+J & then press Ctrl+U & use the following settings

- Now Blending Mode of this Layer should ‘Pin Light’

- Now your image should look like as shown below

- Now again make the Duplicate layer3 & then go to Blending Options select Gradient Overlay & use the following settings


- Now your image should look like as shown below

- Now once again make the Duplicate Layer & then Blending Mode of this Layer should “Normal”

- Now create the following Transformation with the help of Ctrl+T & then press ENTER

- Now go to Blending Options,select Gradient Overlay & use the following settings


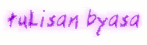
- Now create the Following Text with the help of Text Tool

- Now select Text Layer & then go to Blending Options,select Gradient Overlay & use the following settings

- Now make the Duplicate Text Layer,press Ctrl+T right click select ‘flip vertical’